For work I had to create a quick VPN link to monitor some instruments off-site. To do this I selected a TP-LINK TL-WR1043ND.
These are nice, little, and importantly, cheap gigabit routers that are easy to upgrade to run dd-wrt. At one point they were selling for just over $30 on Amazon.com.
Here are my notes for installing dd-wrt and setting up the VPN:
INSTALLING DDWRT
Start by downloading ddwrt for the TP-LINK here. Get the factory-to-ddwrt.bin. Please know that the published dd-wrt was incompatible with most new models of the 1043 and the WAN port wouldn’t function. The version as of writing this is v24 pre SP2 build 21061 and I haven’t had any issues. If you do find yourself having issues and you are daring you can try out a later image found here.
Once downloaded follow dd-wrt’s 30-30-30 hard reset:
- Hold down reset for 30 seconds.
- Unplug the device while still holding reset for 30 seconds.
- Plug in the TP-LINK and still holding reset for 30 seconds.
So you’ll be holding down reset for a full 90 seconds.
Then log into the the 1043. The admin user and password are on the back of the device. In the left navigation go to System Tools -> Firmware Upgrade. Upload the .bin you downloaded and click upgrade.
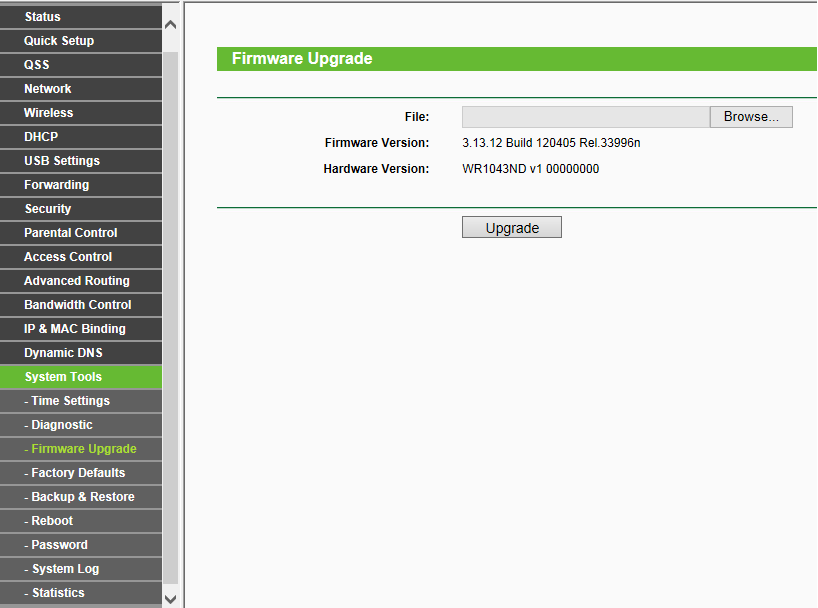
TP-LINK default firmware upgrade.
DD-WRT SETUP
Now log into the newly flashed TP-LINK. The default IP is 192.168.1.1. The first screen will let you set your admin user and password. I recommend you do not use the one written on the device. I won’t go into everything in this post, but I prefer to always turn off telnet and turn on ssh admin.
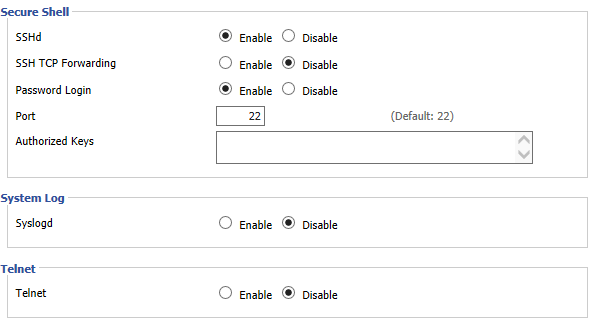
Turn off telnet and turn on SSH.
GENERATING KEYS AND CERTS
To get openvpn up and running you’ll need to build a set of keys and certificates. You can download easy-rsa to assist with this here. There are instructions and a detailed explanation of how to use easy-rsa here. A brief explanation is below.
- Update the vars file and fill in the country, province, city, org, email, ou.
- source the vars file
. ./vars ./clean-all./build-ca./build-dhThis will take a long time../build-key-server server./build-key client1This is the client name.
You’ll now have a very well populated keys directory. If you ever run clean-all again this will be deleted. So back it up if you are going to start over.
Finally you’ll need a ta.key. To do this ssh into the TP-LINK router. Please note the user is root when ssh-ing into the router. The password is the one you set up as an admin password originally. When logged in run openvpn --genkey --secret ta.key
Then cat the ta.key: cat ta.key
You’ll need to save the ta.key somewhere off of the TP-LINK. The storage there is volatile and will not survive a reboot.
CONFIGURE THE VPN SERVICE
Now back to the TP-LINK GUI. dd-wrt has made this process so simple now. You may find instructions that involve going to Administration => Commands. That is no longer needed and everything you need is available in the GUI.
Go to Services => VPN. Enable the VPN server and set the UI to match this picture:
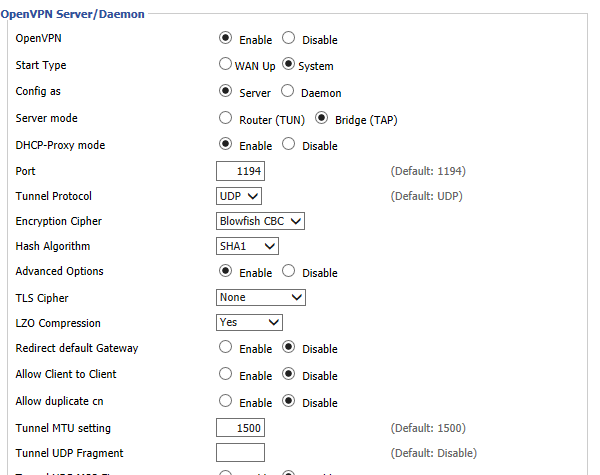
Upper settings for VPN server.
Now add the keys and certs to the spaces documented in the image. Please only add the text inbetween the ——<Text>—–<Base64>——<Text>——
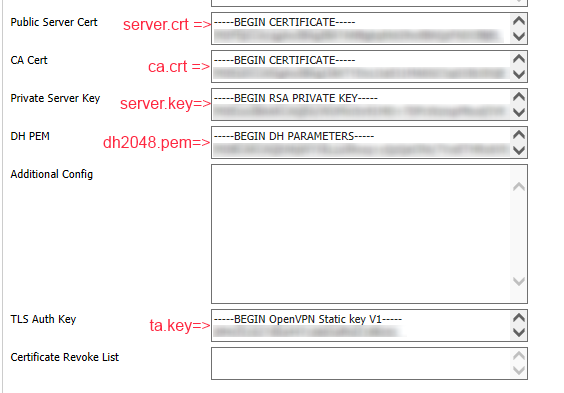
OpenVPN key and cert settings.
Hit Save and then Apply Settings
VPN CLIENT INSTALL
These instructions are Windows focused for the client:
- Download the OpenVPN software and select 32 bit or 64 bit per your system.
- Right click and install the software as admin.
- Navigate to C:\Program Files\OpenVPN\config
- Add the ca.crt, client1.key, client1.crt, and ta.key to the config directory
- Add the client.ovpn config (I’ll post below).
VPN CLIENT CONFIG FILE
client

dev tap

proto udp

tls-auth ta.key 1

remote <your_remote_server>

resolv-retry infinite

nobind

persist-tun

persist-key

ca ca.crt

cert client1.crt

key client1.key

ns-cert-type server

comp-lzo

verb 3
Save this as client1.ovpn
CONNECTING TO THE REMOTE SERVER
Find the OpenVPN GUI in the Windows start menu. Right click and run as admin. This will add an icon in your system tray. Right click on the item and select connect.
You will now be connected to the remote network. You can check by running a cmd terminal and issuing ipconfig. This will list your interfaces and one should be on the remote network.